How to Measure Your Kitchen for New Cabinets: A Step-by-Step Guide
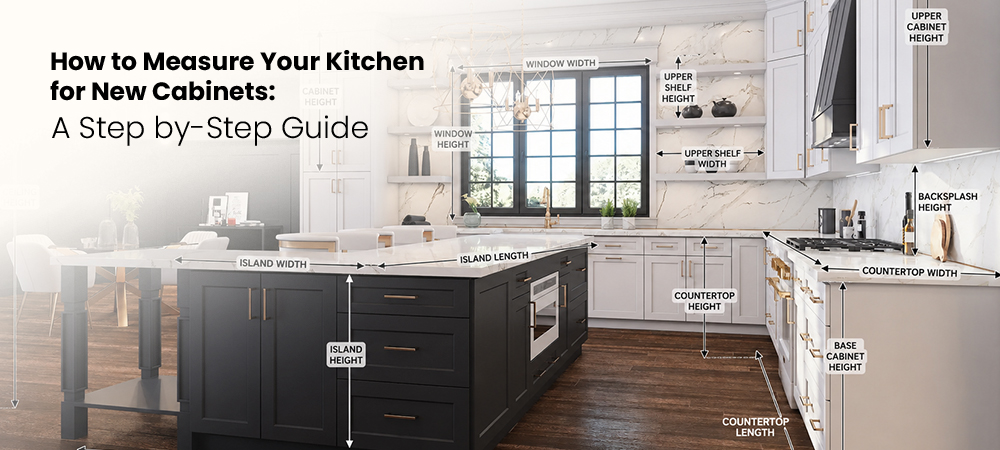
Ordering kitchen cabinets starts with one unglamorous task that determines whether everything else goes smoothly: measuring. Get it right and your cabinets land in place like puzzle pieces. Get it wrong and you’re staring at a 3-inch gap next to the refrigerator — or a cabinet that blocks a window crank.
The good news: measuring a kitchen accurately requires no special skill. It requires a tape measure, a notepad (or phone), an hour of your time, and a method. Here’s the method.
What You’ll Need
- A 25-foot steel tape measure (not a soft sewing tape — it sags)
- Paper and pencil, or a notes app — graph paper is ideal
- A level (a phone level app works for checking walls and floors)
- A helper for long walls (optional but useful)
Measure in inches, to the nearest 1/8 inch. Cabinet sizing in the U.S. runs in 3-inch increments, but your walls don’t — precision now buys you flexibility later.
Step 1: Sketch the Room First
Before you measure anything, draw the shape of your kitchen from above — a bird’s-eye view. It doesn’t need to be pretty. Mark every wall, door, window, and opening, and label the walls A, B, C, D going clockwise. Add the immovable objects: plumbing location, gas line, range hood vent, electrical panel, radiators, and anything else that isn’t going anywhere.
This sketch is where every number you take will live. A measurement without a location on the sketch is a number you’ll second-guess next week.
Step 2: Measure Each Wall, Corner to Corner
Run the tape along each wall at counter height (about 36 inches off the floor), from corner to corner, and write the total on your sketch. Then measure the same wall again at about 60 inches (upper cabinet height). If the two numbers differ by more than about a quarter inch, note both — walls lean, and the cabinets need to fit the tighter number.
Measure everything twice. The carpenter’s rule exists because the single most expensive measuring mistake is a transposed digit you only catch after the freight truck leaves.
Step 3: Locate Windows and Doors
For every window and door on each wall, record three numbers, always measuring to the outside edge of the trim/casing (cabinets can’t overlap trim):
- Distance from the nearest corner to the near edge of the trim
- Width of the window or door including trim
- Distance from the far edge of the trim to the next corner (or next opening)
Those three numbers should add up to your wall total — that’s your built-in error check. For windows, also record the height from the floor to the bottom of the sill, and from the floor to the top of the trim. Base cabinets and countertops need to clear the sill; wall cabinets need to clear the top trim.
Step 4: Measure Ceiling Height — in Several Places
Measure floor to ceiling in at least four spots around the room, including every corner where tall or wall cabinets will go. Older homes routinely vary an inch or more across a single kitchen. Record the lowest number — that’s the height your tall cabinets and crown molding must live under.
If you’re planning cabinets to the ceiling or a bulkhead/soffit, measure the soffit’s depth and height separately, in more than one place.
Step 5: Map the Utilities
On your sketch, measure from the nearest corner to the centerline of each of these:
- Sink plumbing (the drain center under the sink)
- Range gas line or 240V outlet
- Refrigerator water line and outlet
- Dishwasher connection
- Range hood vent (and whether it exits through the wall or ceiling)
- Light switches and outlets on walls that will get backsplash or cabinets
The sink base cabinet must land on the plumbing. Everything else in the layout radiates out from that fixed point, so this centerline measurement is arguably the most important number on the page.
Step 6: Measure the Appliances
List every appliance staying in or entering the kitchen with its width, depth, and height:
- Refrigerator: width and height including door hinges and water line clearance; standard openings are typically 36 inches wide but verify against the spec sheet
- Range/cooktop: standard is 30 inches, but 36-inch ranges are common in remodels
- Dishwasher: almost always 24 inches, but measure anyway
- Microwave: if over-the-range, note the required clearance above the cooktop
- Wall ovens: these live inside a tall cabinet — the cabinet’s interior cutout must match the oven spec sheet exactly
If you’re buying new appliances, download the manufacturer’s installation spec sheets. Cabinet openings are built to those numbers, not to the appliance’s outer shell.
Step 7: Check Square and Level (Two Minutes That Save Headaches)
In each corner where a run of cabinets will meet, measure 36 inches out along one wall and 36 inches along the other, then measure diagonally between those two marks. If the diagonal is about 50-7/8 inches, the corner is square. Off by half an inch or more? Note it — corner cabinets and countertop fabricators need to know.
Run your level along the floor where base cabinets will sit. A floor that slopes an inch across the room is normal in older homes and fixable with shims — but it’s better discovered on paper than on installation day.
The Five Most Common Measuring Mistakes
- Measuring to the drywall next to trim instead of the trim edge. Cabinets meet casing, not drywall.
- Forgetting door swings. A dishwasher door, an oven door, and an entry door can all collide with cabinet hardware. Sketch the swing arcs.
- Assuming corners are square. They rarely are, and corner cabinets are the least forgiving boxes in the kitchen.
- Using the old cabinets as the measurement. Your current cabinets tell you what fit in 1994 with 1994’s appliances. Measure the room, not the boxes.
- Rounding. “About 96 inches” and 95-5/8 inches are different kitchens. Record what the tape says.
Measuring for a Kitchen Island
Islands get their own rules because they’re defined by clearance, not walls. Mark the island’s proposed footprint on the floor with painter’s tape, then verify:
- 36 inches minimum of clearance on every working side (42–48 inches where two people pass or an appliance door opens into the aisle)
- Dishwasher, oven, and refrigerator doors must open fully without hitting the island — tape the door swings on the floor too
- If the island holds a sink or cooktop, mark where plumbing or electrical comes up through the floor and measure its position from two fixed walls
A common rule of thumb: if the room is less than about 13 feet in one direction, a fixed island starts to fight the kitchen. Measure honestly before falling in love with one.
Special Cases: Pantries, Laundry Rooms, and Bathrooms
The same method covers any cabinet space, with a few extras. For tall pantry cabinets, confirm ceiling height at the exact spot the cabinet stands and along the path you’ll tip it upright — a 96-inch pantry needs more than 96 inches of diagonal room to stand up (subtract an inch of height if your ceiling is exactly 96). For laundry rooms, measure washer and dryer with hoses and vent behind them, not just the machine body. For bathroom vanities, measure the drain and supply-line centerlines from the side wall, and check door and drawer clearance against the toilet and shower swing.
Frequently Asked Questions
-
Should I measure before or after demolition?
Both if you can. Measure now to plan and price the layout; re-verify the critical numbers (wall lengths, plumbing centerline, ceiling height) after the old cabinets come out, before finalizing the order. Old cabinets and soffits hide surprises.
-
Do I need a professional measure?
For a straightforward kitchen, a careful DIY measure with this method is enough to order from. If your kitchen has out-of-square corners beyond a half inch, sloped floors, or a complicated island plan, a professional site measure is cheap insurance against a four-figure mistake.
-
What if my measurements don’t add up?
If the window segments don’t sum to the wall total, re-measure before you shrug — a half-inch discrepancy usually means the tape drifted or a trim edge got skipped, and finding it now is the whole point of the cross-check.
What to Do With Your Measurements
With your dimensioned sketch in hand, you can plan a layout in standard cabinet sizes — widths run in 3-inch increments (9″, 12″, 15″ … 36″), with filler strips covering the remainder against walls. A few planning basics:
- Keep at least 36 inches of clear walkway through work zones (42+ inches is more comfortable).
- Standard base cabinets are 24 inches deep and 34-1/2 inches tall (36 inches with countertop); wall cabinets are 12 inches deep.
- Leave 18 inches between countertop and wall cabinets, and check your range hood’s required height above the cooktop.
You don’t have to turn the sketch into a cabinet list alone. Send us your drawing — photos of a hand sketch are fine — and we’ll help you translate it into a cabinet layout that fits, with door styles and pricing to compare. South Florida customers can bring measurements straight into our Boynton Beach showroom and work through the layout in person with cabinet samples in front of them; everyone else can reach us at 954-667-2148 or through the site, and we ship nationwide.
Measure twice. Sketch once. The rest is the fun part.
RTA Cabinets Fast sells ready-to-assemble and pre-assembled cabinets online and from our Boynton Beach, FL showroom, with nationwide shipping and free local pickup.